[Part 4] VWorkflows & Multiple Inputs/Outputs
UPDATE [23.05.2014]: This tutorial has been updated to work with recent versions of VWorkflows.
In the last three parts of the tutorial VWorkflows did only handle one input/output per node. However, for many use cases it is necessary to handle multiple connectors per node (see Issue 3). This tutorial is shows lots of amazing features!
Feedback
Thanks for your motivating feedback!
For those of you who have asked me about custom node content: I’m working on a tutorial. Stay tuned! & follow me on Twitter.
If you’d like to contribute or if you want to ask questions about VRL, VWorkflows and other related projects join the Developer & User groups:
- Developer Group: https://groups.google.com/forum/#!forum/vrl-developers
- User Group: https://groups.google.com/forum/#!forum/vrl-studio-users
UI Improvements
The JavaFX based UI has been heavily improved. It makes use of the new multi-connector API (see below).
Multiple Connectors
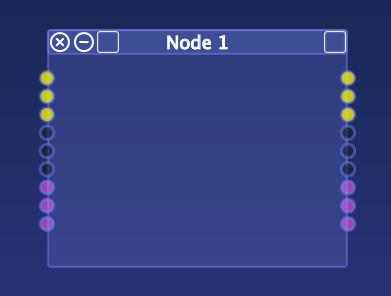
- multiple connectors per node: each node can have an arbitrary number of input and output connectors
- dynamic connector size: connector size changes dynamically (depending on node size and the number of connectors)
Usability Improvements
improved compatibility visualization: connections indicate if they are compatible, i.e., if the connection the user is trying to establish will be accepted
subflow icon: flows have a new icon that allows to create subviews, i.e., a window that shows the flow content in a separate window. this feature is great to interactively change complex workflows
New Multi-Connector API
To be able to handle complex workflows/graphs the model has been extended to allow the definition of arbitrary many inputs and outputs. Instead of the previous
n.addInput("type");
n.addOutput("type");
connectors are now added by calling
Connector c1 = n.addInput("type1");
Connector c2 = n.addOutput("type1");

// adding a second input&output
Connector c3 = n.addInput("type2");
Connector c4 = n.addOutput("type2");
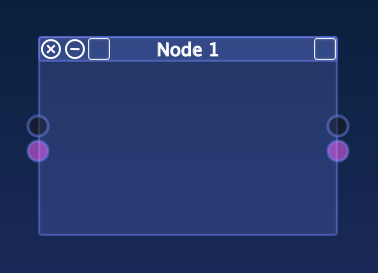
This is how the node will look like:
As you can see there is a new Connector interface. A connector knows its type, keeps a reference to the node it belongs to and has an id:
// returns the node this connector belongs to
c1.getNode();

// returns the global connector id (unique per flow)
c1.getId();

// returns the local connector id (id is unique per node)
c1.getLocalId()

// returns the type of the connector
c1.getType()
The API for connecting nodes has been extended. Here is an example (we assume flow and nodes n1 and n2 have been created):
// adding output to n1
Connector c1 = n1.addOutput("type");

// adding input to n2
Connector c2 = n2.addInput("type");

// creating connection between n1 and n2
Connection connection = flow.connect(c1,c2)
In addition each node can have one main input and output per type. This allows to directly connect two nodes without the need to explicitly specify the connectors. The UI can use this to resemble the previous connection behavior (before the multi in/out implementation).
Demo application
Download the tutorial code from GitHub
Requirements:
- Java 8
- Optional: Netbeans >=7.4 with Gradle Plugin
Building & Running:
To compile from the command line just type ./gradlew build. Run it with ./gradlew run.
Next steps
Download VWorkflows and create your own flow visualization apps/controls.
Stay tuned and follow me on Twitter
To be continued…
Update: here is part 5


