Workflow Visualization With VWorkflows & JavaFX [Part 2]
This is the second part of the VWorkflows tutorial. In the first part we demonstrated how to create nodes, define connections and how to visualize them with JavaFX.
Thanks for all your feedback! This was the motivation for me to create this second tutorial.
UPDATE [23.05.2014]: This tutorial has been updated to work with recent versions of VWorkflows.
Overview
In this tutorial you will learn how to
- set node location, width and height
- create subflows
- use selective visualization to handle large flows with thousands of flow nodes
- search nodes by global ids
- create complex flows
VWorkflows Still Needs Your Contribution!
Are you interested in creating flow visualizations with JavaFX? Currently, the library is in an early state. So this is ideal for contributing ideas on how the library should be designed. We’d love to integrate your contributions. Feel free to contact us!
Specify Node Location & Size
Position and size information is currently part of the node model:
// define node position
n.setX(10)
n.setY(10)

// define node size
n.setWidth(160)
n.setHeight(100)
Note: The user interface binding is responsible for evaluating the layout data. It is an optional information that does not influence the flow itself. The default ui binding for JavaFX makes use of it and uses it to layout the node skins.
Creating Subflows
To create a subflow call the newSubFlow() method. This will return a new flow controller object that has the same functionality as the parent/root flow:
// create a new flow object (see tutorial 1)
VFlow flow = FlowFactory.newFlow();

// create a leaf node (see tutorial 1)
VNode n = flow.newNode();

// create subflow
VFlow subflow = flow.newSubFlow();

// add nodes to the subflow
VNode sn1 = subflow.newNode();
VNode sn2 = subflow.newNode();
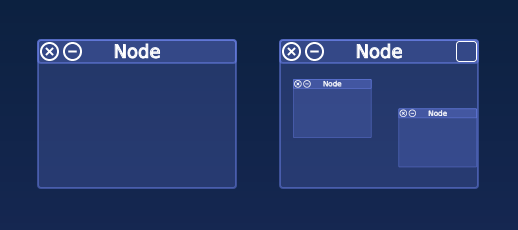
With the default JavaFX based ui binding the flow will look like this:
Selective Visualization
By default subflows don’t show their content. This is an optimization that is necessary to allow large flows with thousands of nodes to be visualized. Thje user can enable the visualizations for the parts he is interested in. The API call for this is as simple as:
flow.setVisible(true) // enables visualization of flows content
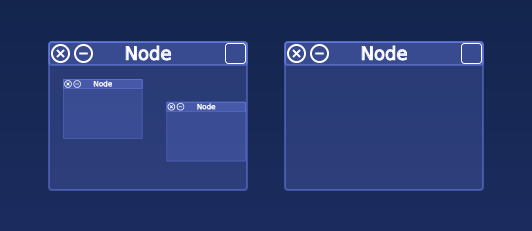
The ui binding does not have to watch this property. The backend calls the add/remove methods of the node skins automatically. The default JavaFX based ui binding displays an icon (right side of the titlebar) that can be clicked to show/hide the content of a flow node:
Complex Flow Example
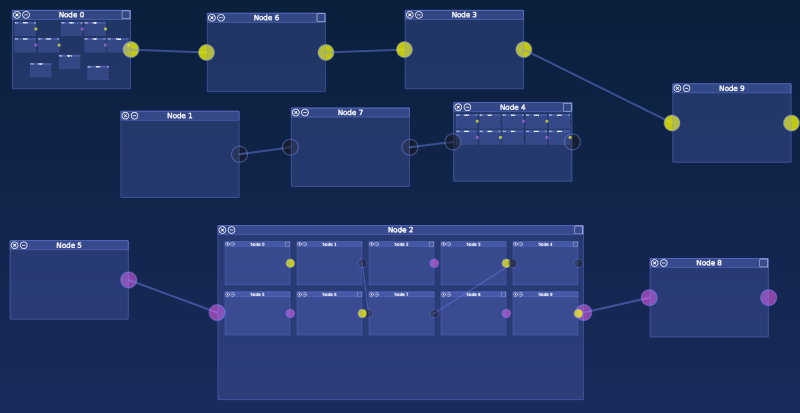
Here is a complex flow example that recursively creates a flow with the specified layer width and depth:
/**
 * Creates a flow with specified width and depth.
 * @param workflow parent workflow
 * @param depth flow depth (number of nested nodes)
 * @param width flow width (number of nodes per layer)
 */
public void createFlow(VFlow workflow, int depth, int width) {

    // stop if we reached deppest layer
    if (depth < 1) {
        return;
    }

    // create nodes in current layer
    for (int i = 0; i < width; i++) {

        VNode n;

        // every second node shall be a subflow
        if (i % 2 == 0) {
            // create subflow
            VFlow subFlow = workflow.newSubFlow();
            n = subFlow.getModel();
            createFlow(subFlow, depth - 1, width);
        } else {
            //create leaf node
            n = workflow.newNode();
        }

        n.setTitle("Node " + i);

        // every third node shall have the same connection type
        // colors for "control", "data" and "event" are currently hardcoded
        // in skin. This will change!
        if (i % 3 == 0) {
            n.addInput("control");
            n.addOutput("control");
        } else if (i % 3 == 1) {
            n.addInput("data");
            n.addOutput("data");
        } else if (i % 3 == 2) {
            n.addInput("event");
            n.addOutput("event");
        }

        // specify node size
        n.setWidth(300);
        n.setHeight(200);

        // gap between nodes
        int gap = 30;

        int numNodesPerRow = 5;

        // specify node position (we use grid layout)
        n.setX(gap+(i % numNodesPerRow) * (n.getWidth() + gap));
        n.setY(gap+(i / numNodesPerRow) * (n.getHeight() + gap));
    }
}
This is how the result will look like:
Search Nodes By Global Id
Each node can be accessed by its id. Assume the following flow:
VNode n1 = flow.newNode();
VNode n2 = flow.newNode();
VFlow f1 = flow.newSubFlow()
VNode n3 = f1.newNode() // assume this node has id "4"
If you know the node id you can perform a global search by calling:
VNode n = flow.getFlowNodeLookup().getById("4")
Demo application
Download the tutorial code from GitHub.
Requirements:
- Java 8
- Optional: Netbeans >=7.4 with Gradle Plugin
Building & Running:
To compile from the command line just type ./gradlew build. Run it with ./gradlew run.
Next steps
Download VWorkflows and create your own flow visualization apps/controls.
Stay tuned and follow me on Twitter
To be continued…
Update: here is part 3


